
How to make a removable bag strap
Bag straps are a quick and easy make, and can add a bit of sparkle to a plain coloured bag.
If you make your bag straps removable, you can swap them out to match an outfit, or your mood that day.
We stock bag strap bundles, for crossbody style straps. You can find out current selection here.
To make a removable crossbody bag strap, either for your current project, or maybe to add to a RTW bag, you can follow these simple instructions.
You will need:
· Approximately 1.5m of webbing
· 2 x swivel clasps to match the width of your webbing
· 1 x slider to match the width of your webbing
1. Slide one of your swivel clasps onto your webbing. If your webbing has a right and wrong side, make sure that the clasp is sitting on the right side.
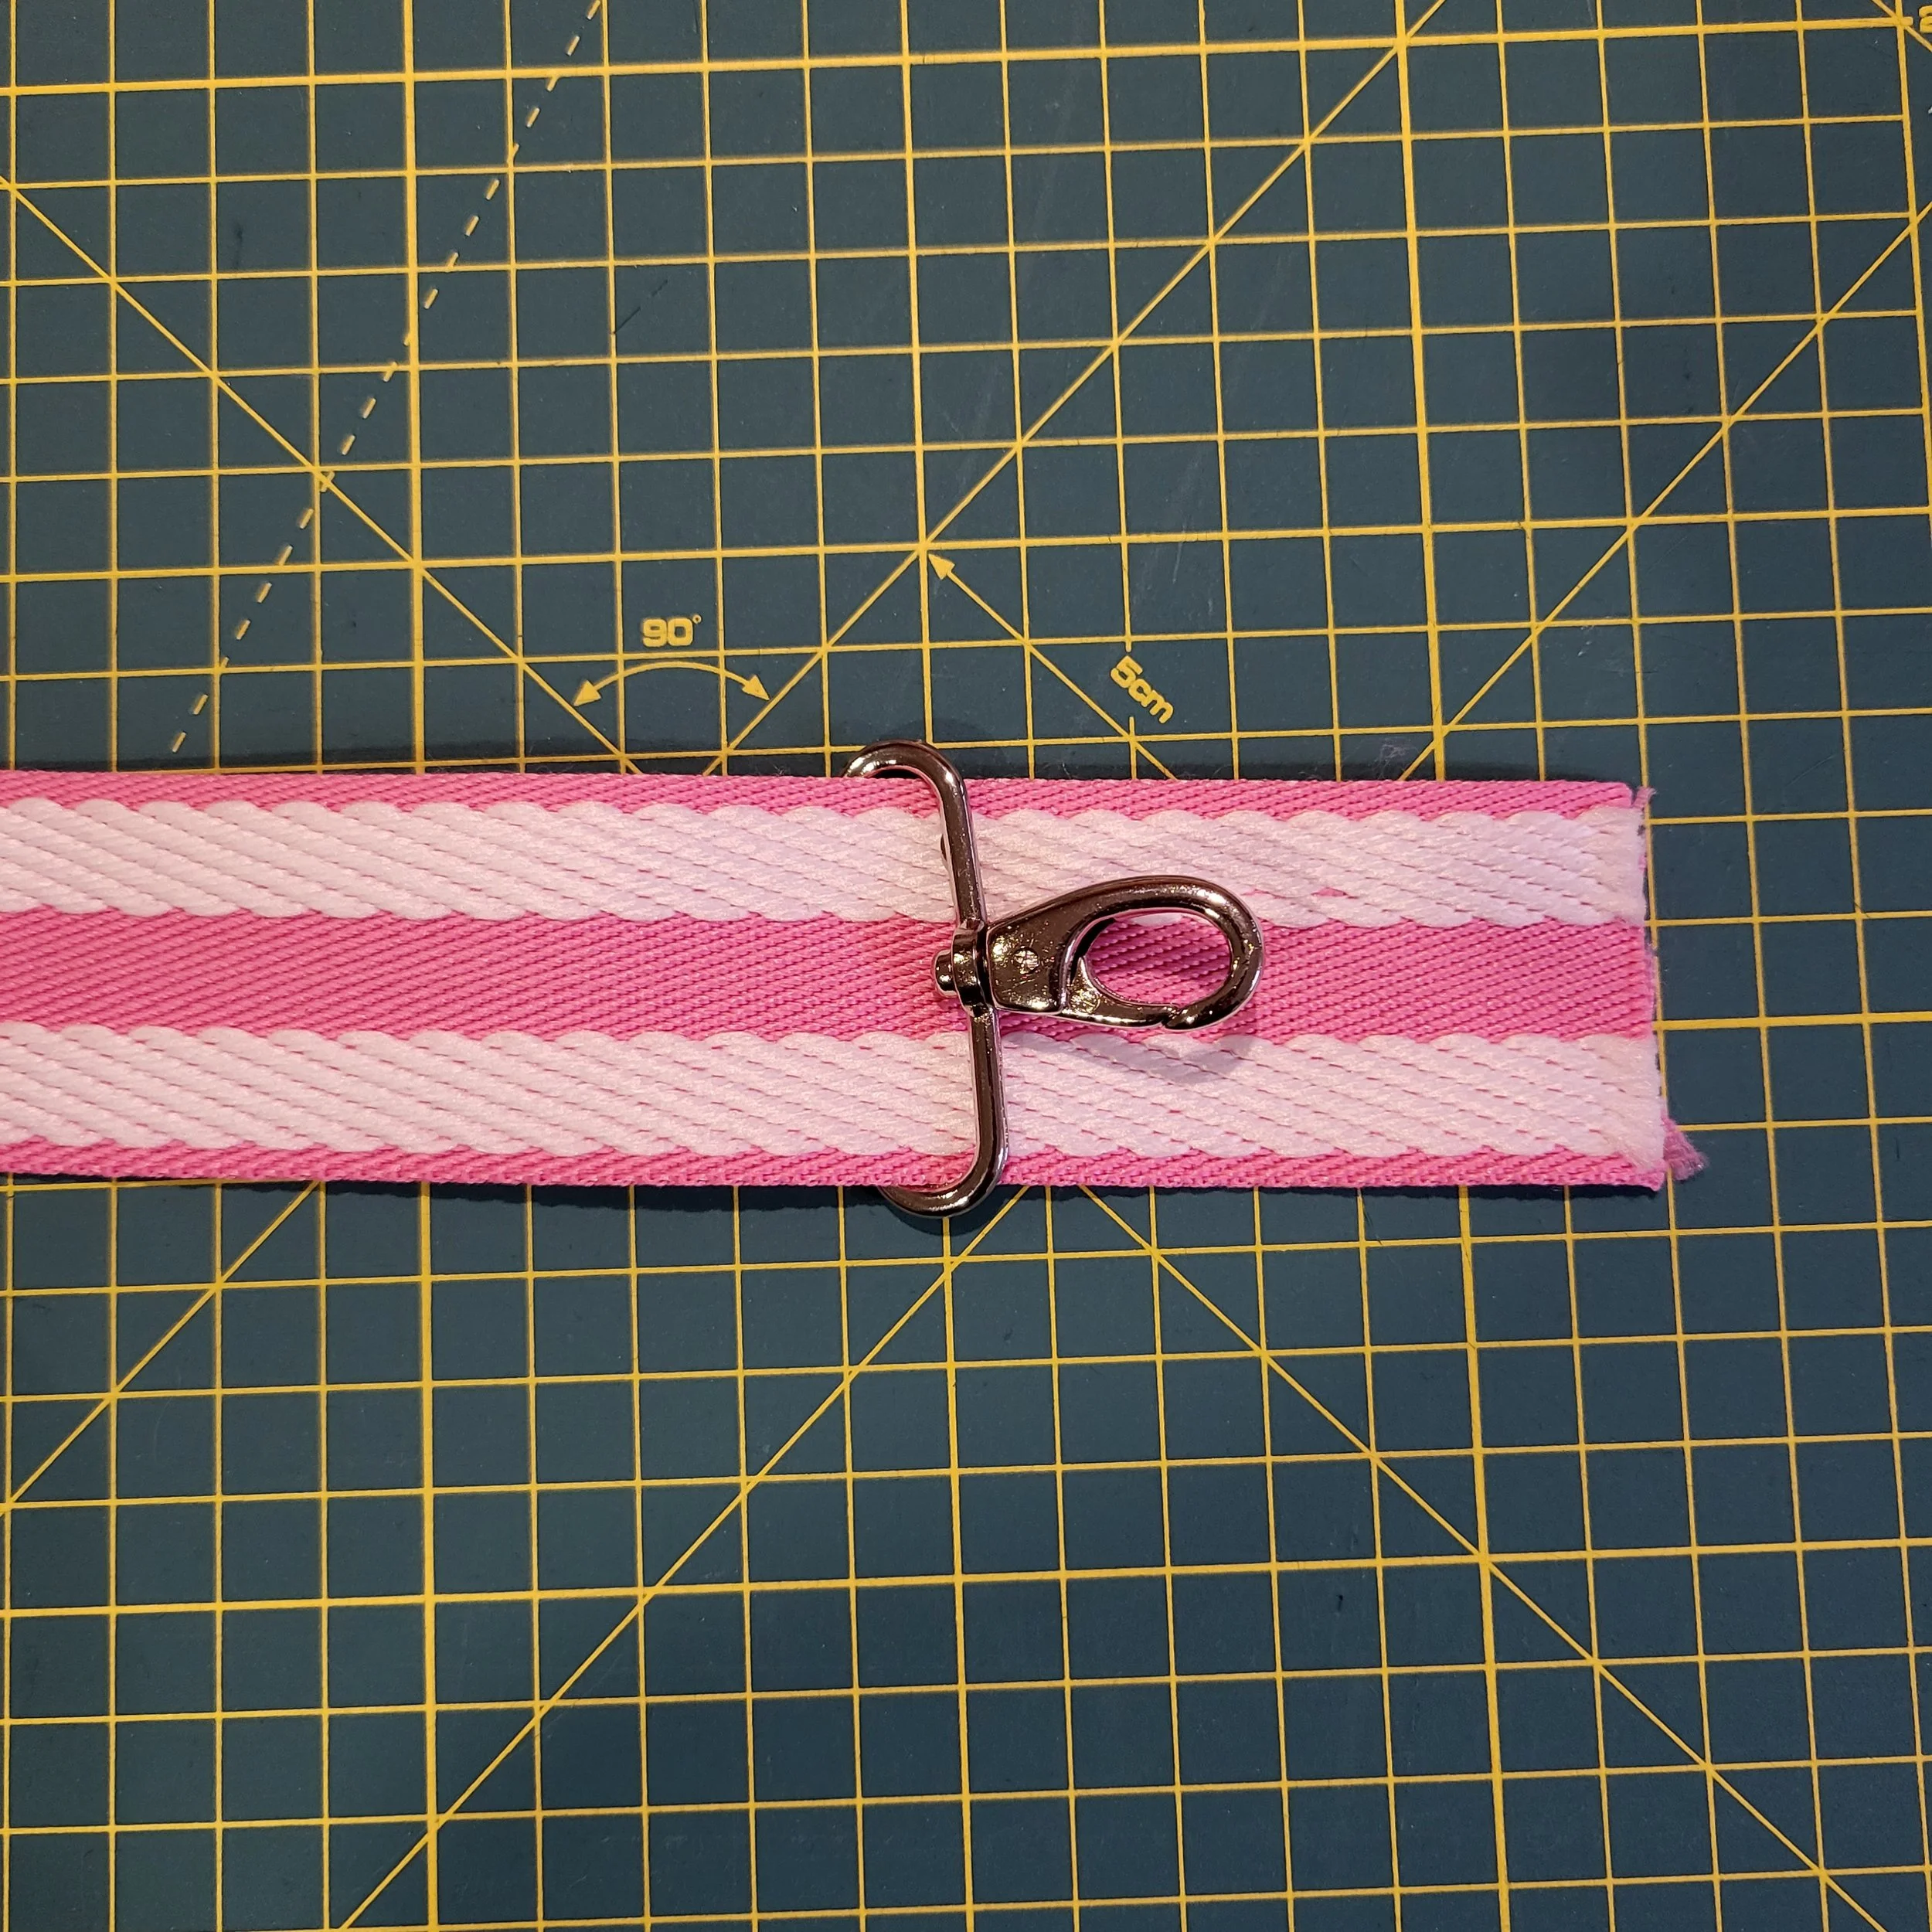
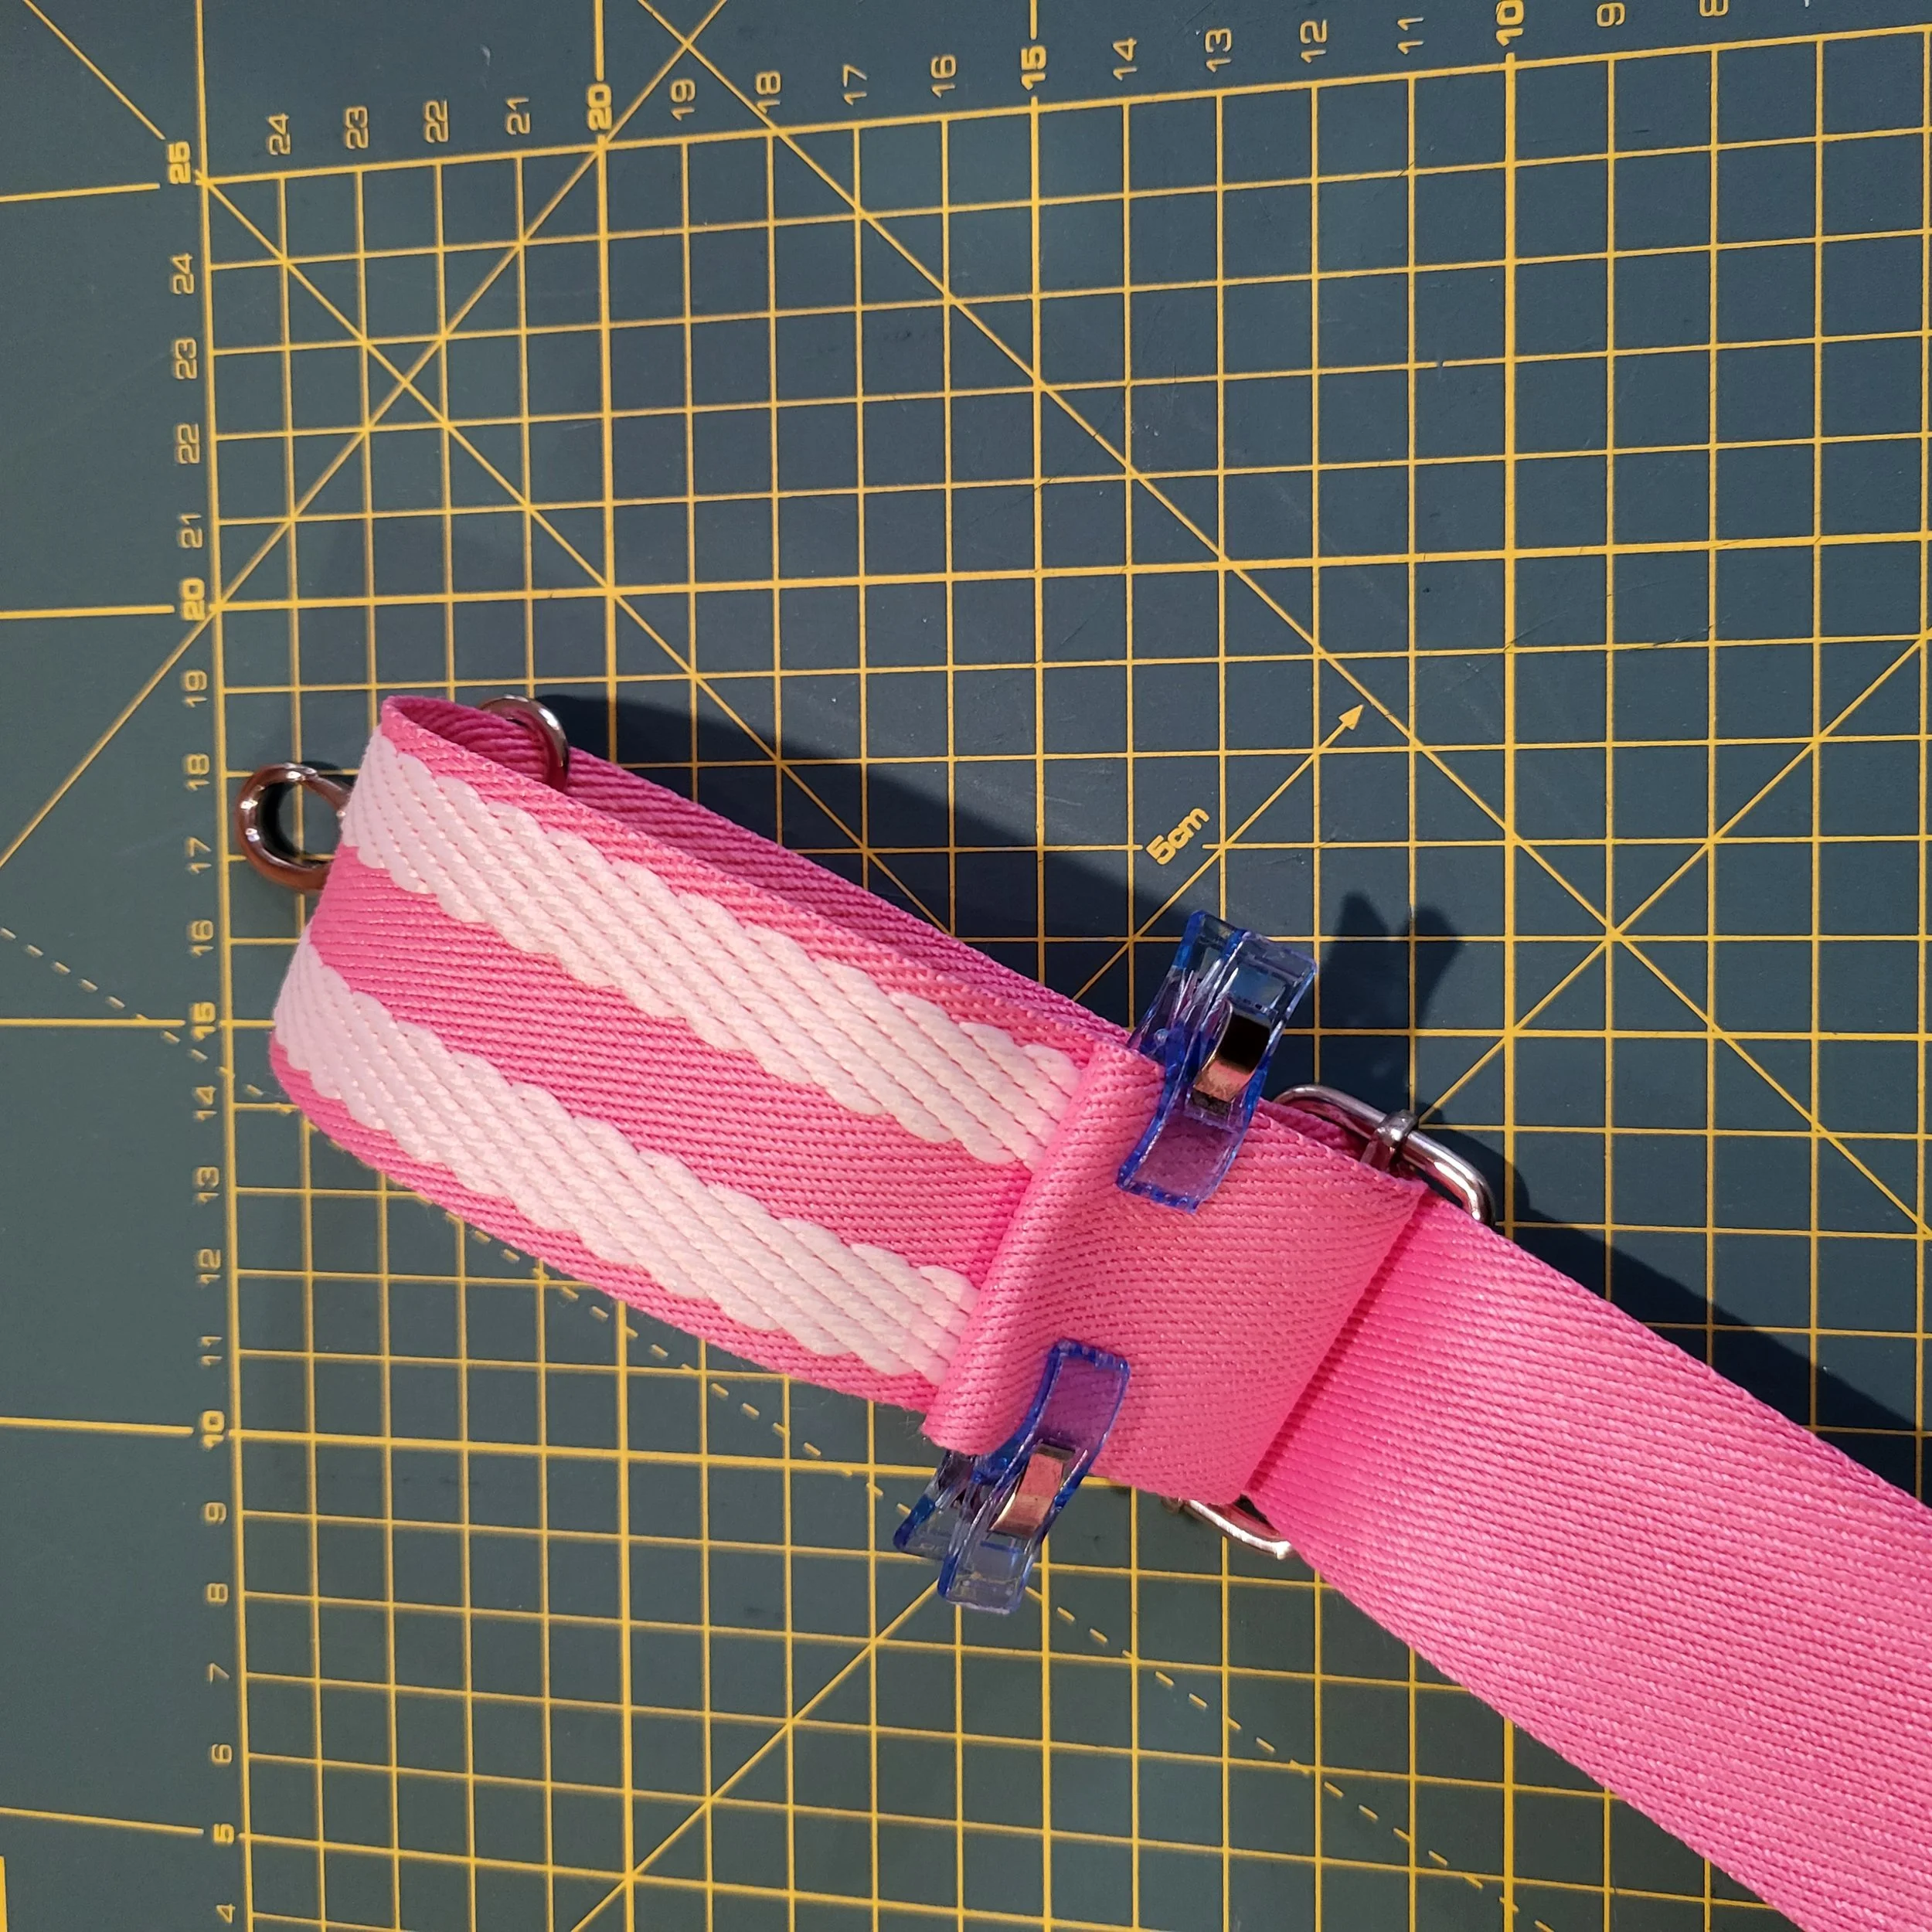
2. Next, take the short end, and fold it over about 2.5cm to the wrong side. Then fold it over again by 2.5cm to enclose the raw edge. This will prevent fraying when your bag strap is in use.
Clip in place, and then sew. You want the folded edge to be approximately 5cm from the clasp.
To get a secure finish, I recommend sewing a box, and then a cross, as shown here.
Take care when sewing near the swivel clasp, you don’t want to get too close to the metal. This is both incredibly tricky, and dangerous.

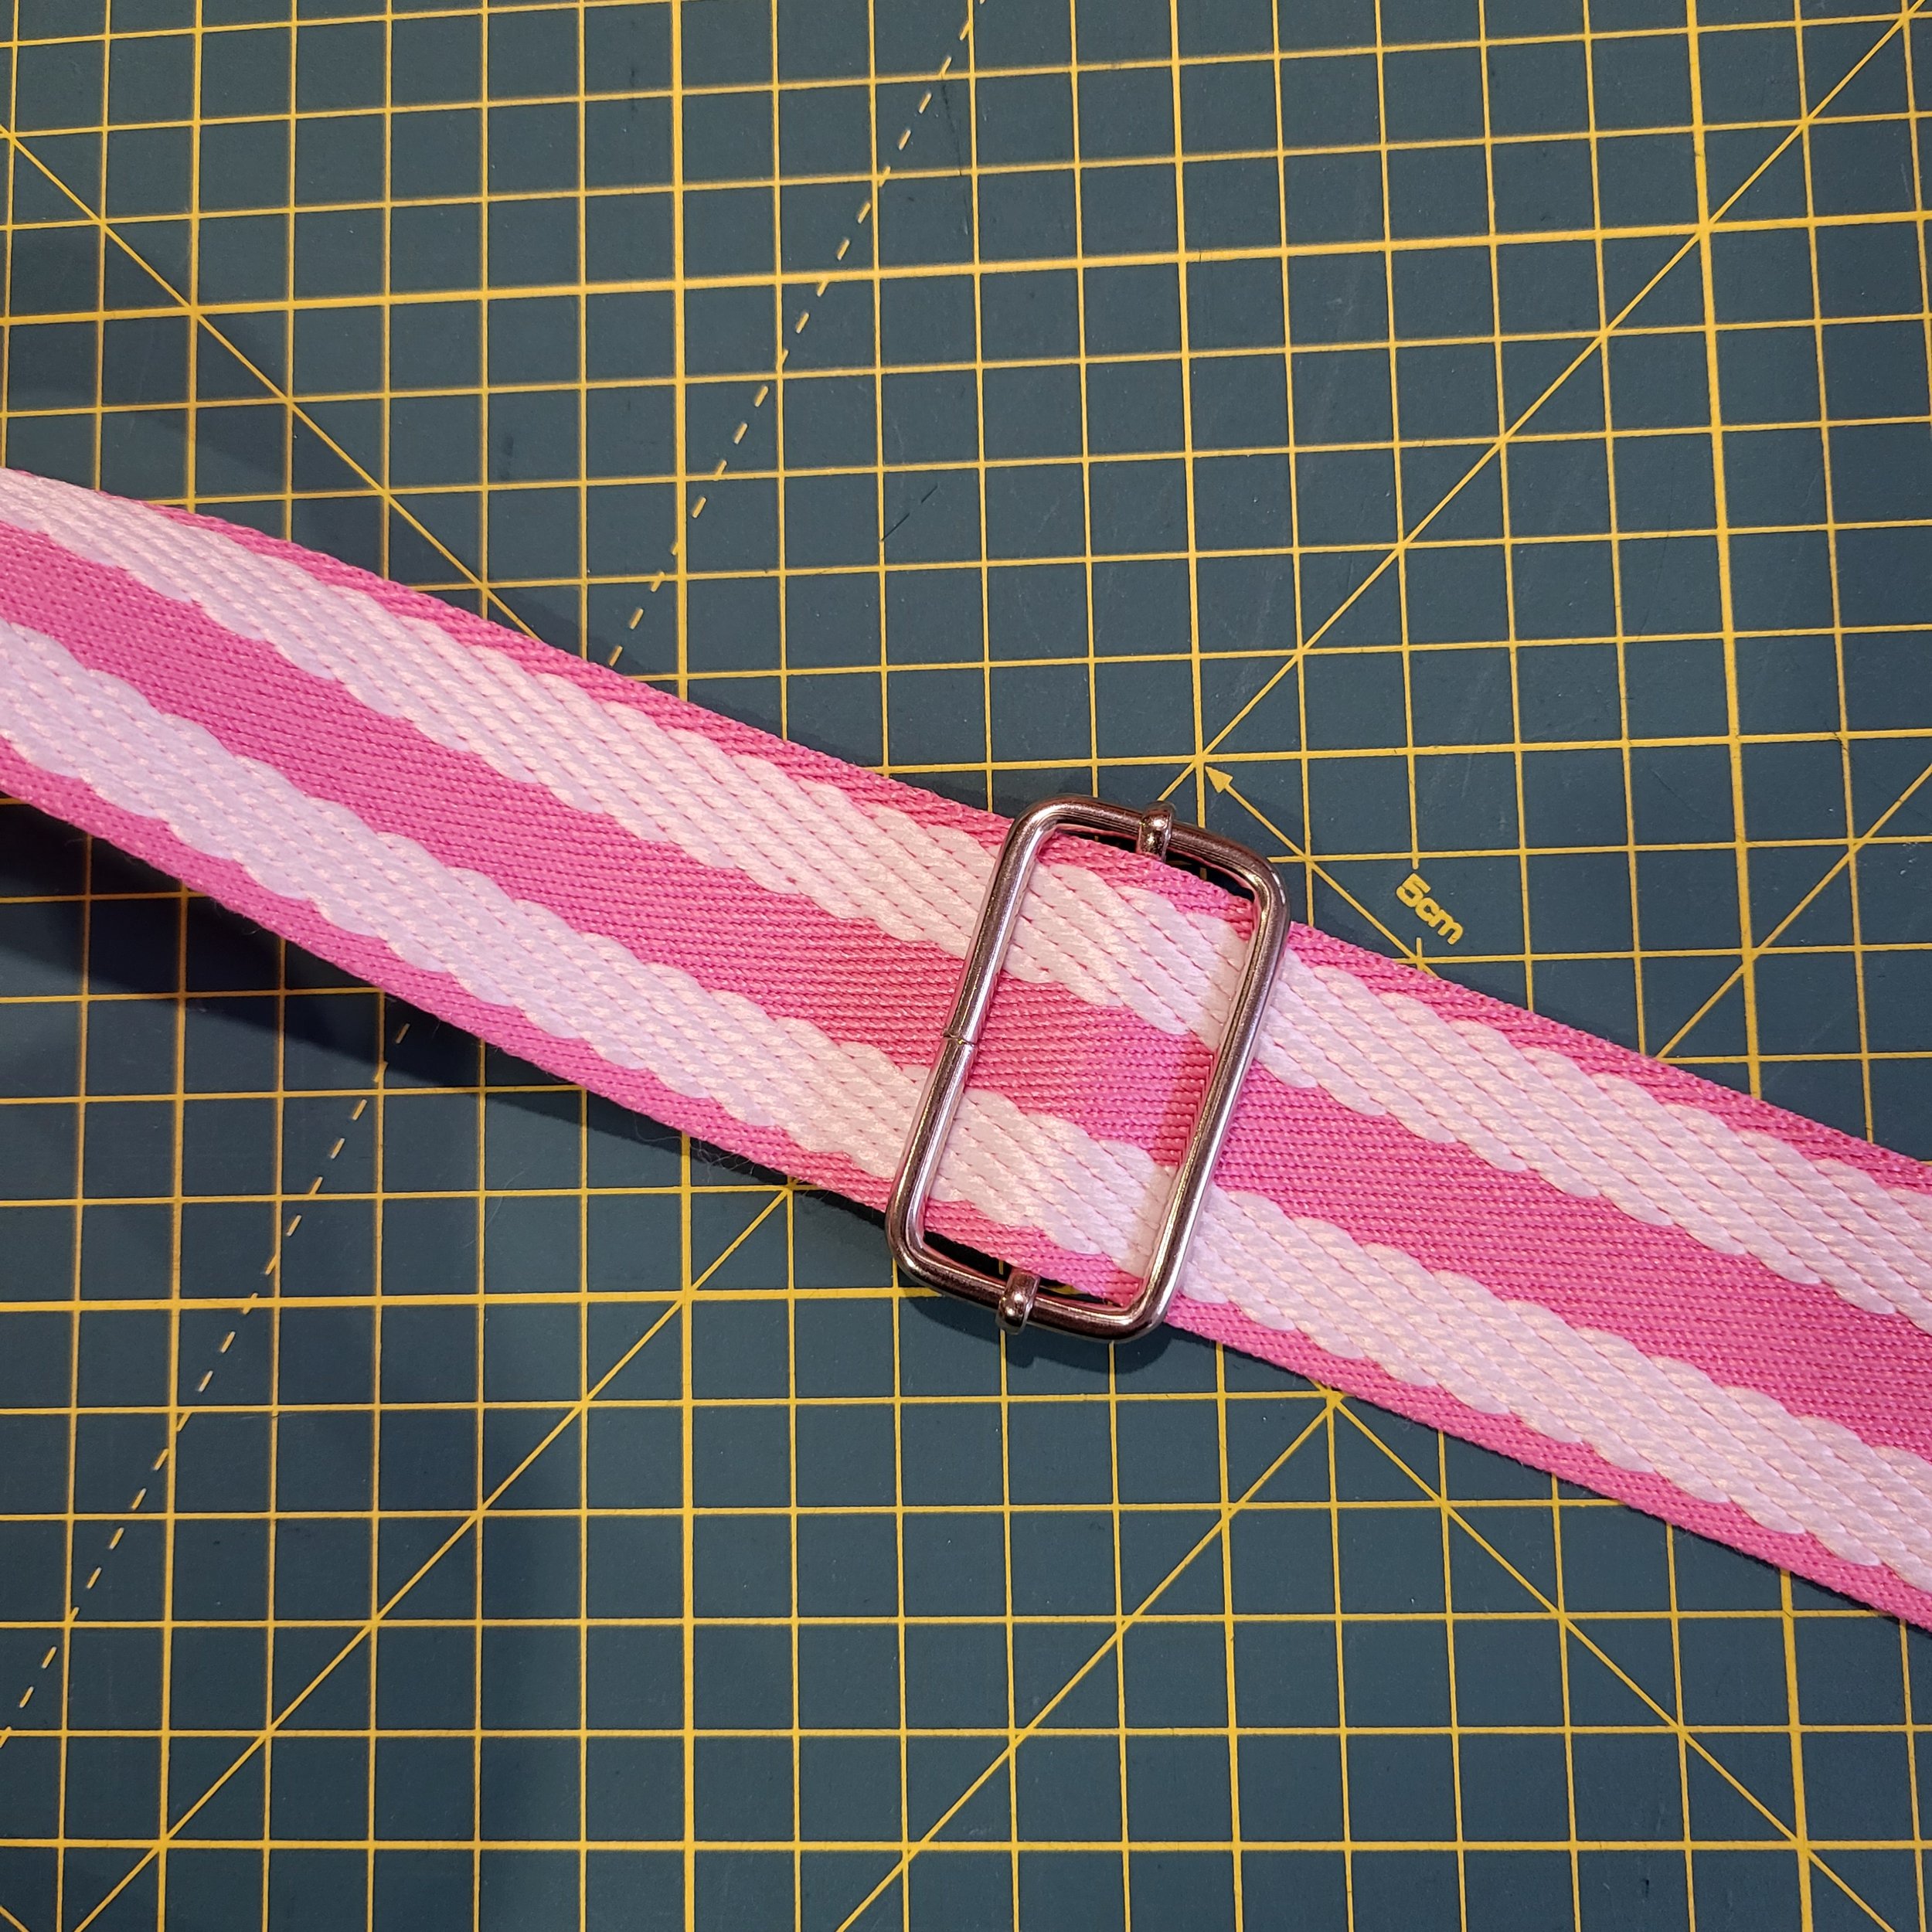
3. Now, we’ll look at the other end of the strap.
First of all, slide the slider onto the strap. If you’re using webbing with a right and wrong side, make sure the slider is positioned so that the webbing passes through with the right side on top.
4. Now that the slider is in position, slide on the remaining swivel clasp, again with the clasp on the right side of the webbing.
If your webbing has no obvious right or wrong side, double check at this point that the slider and swivel clasp here are facing the same way up as the first end!
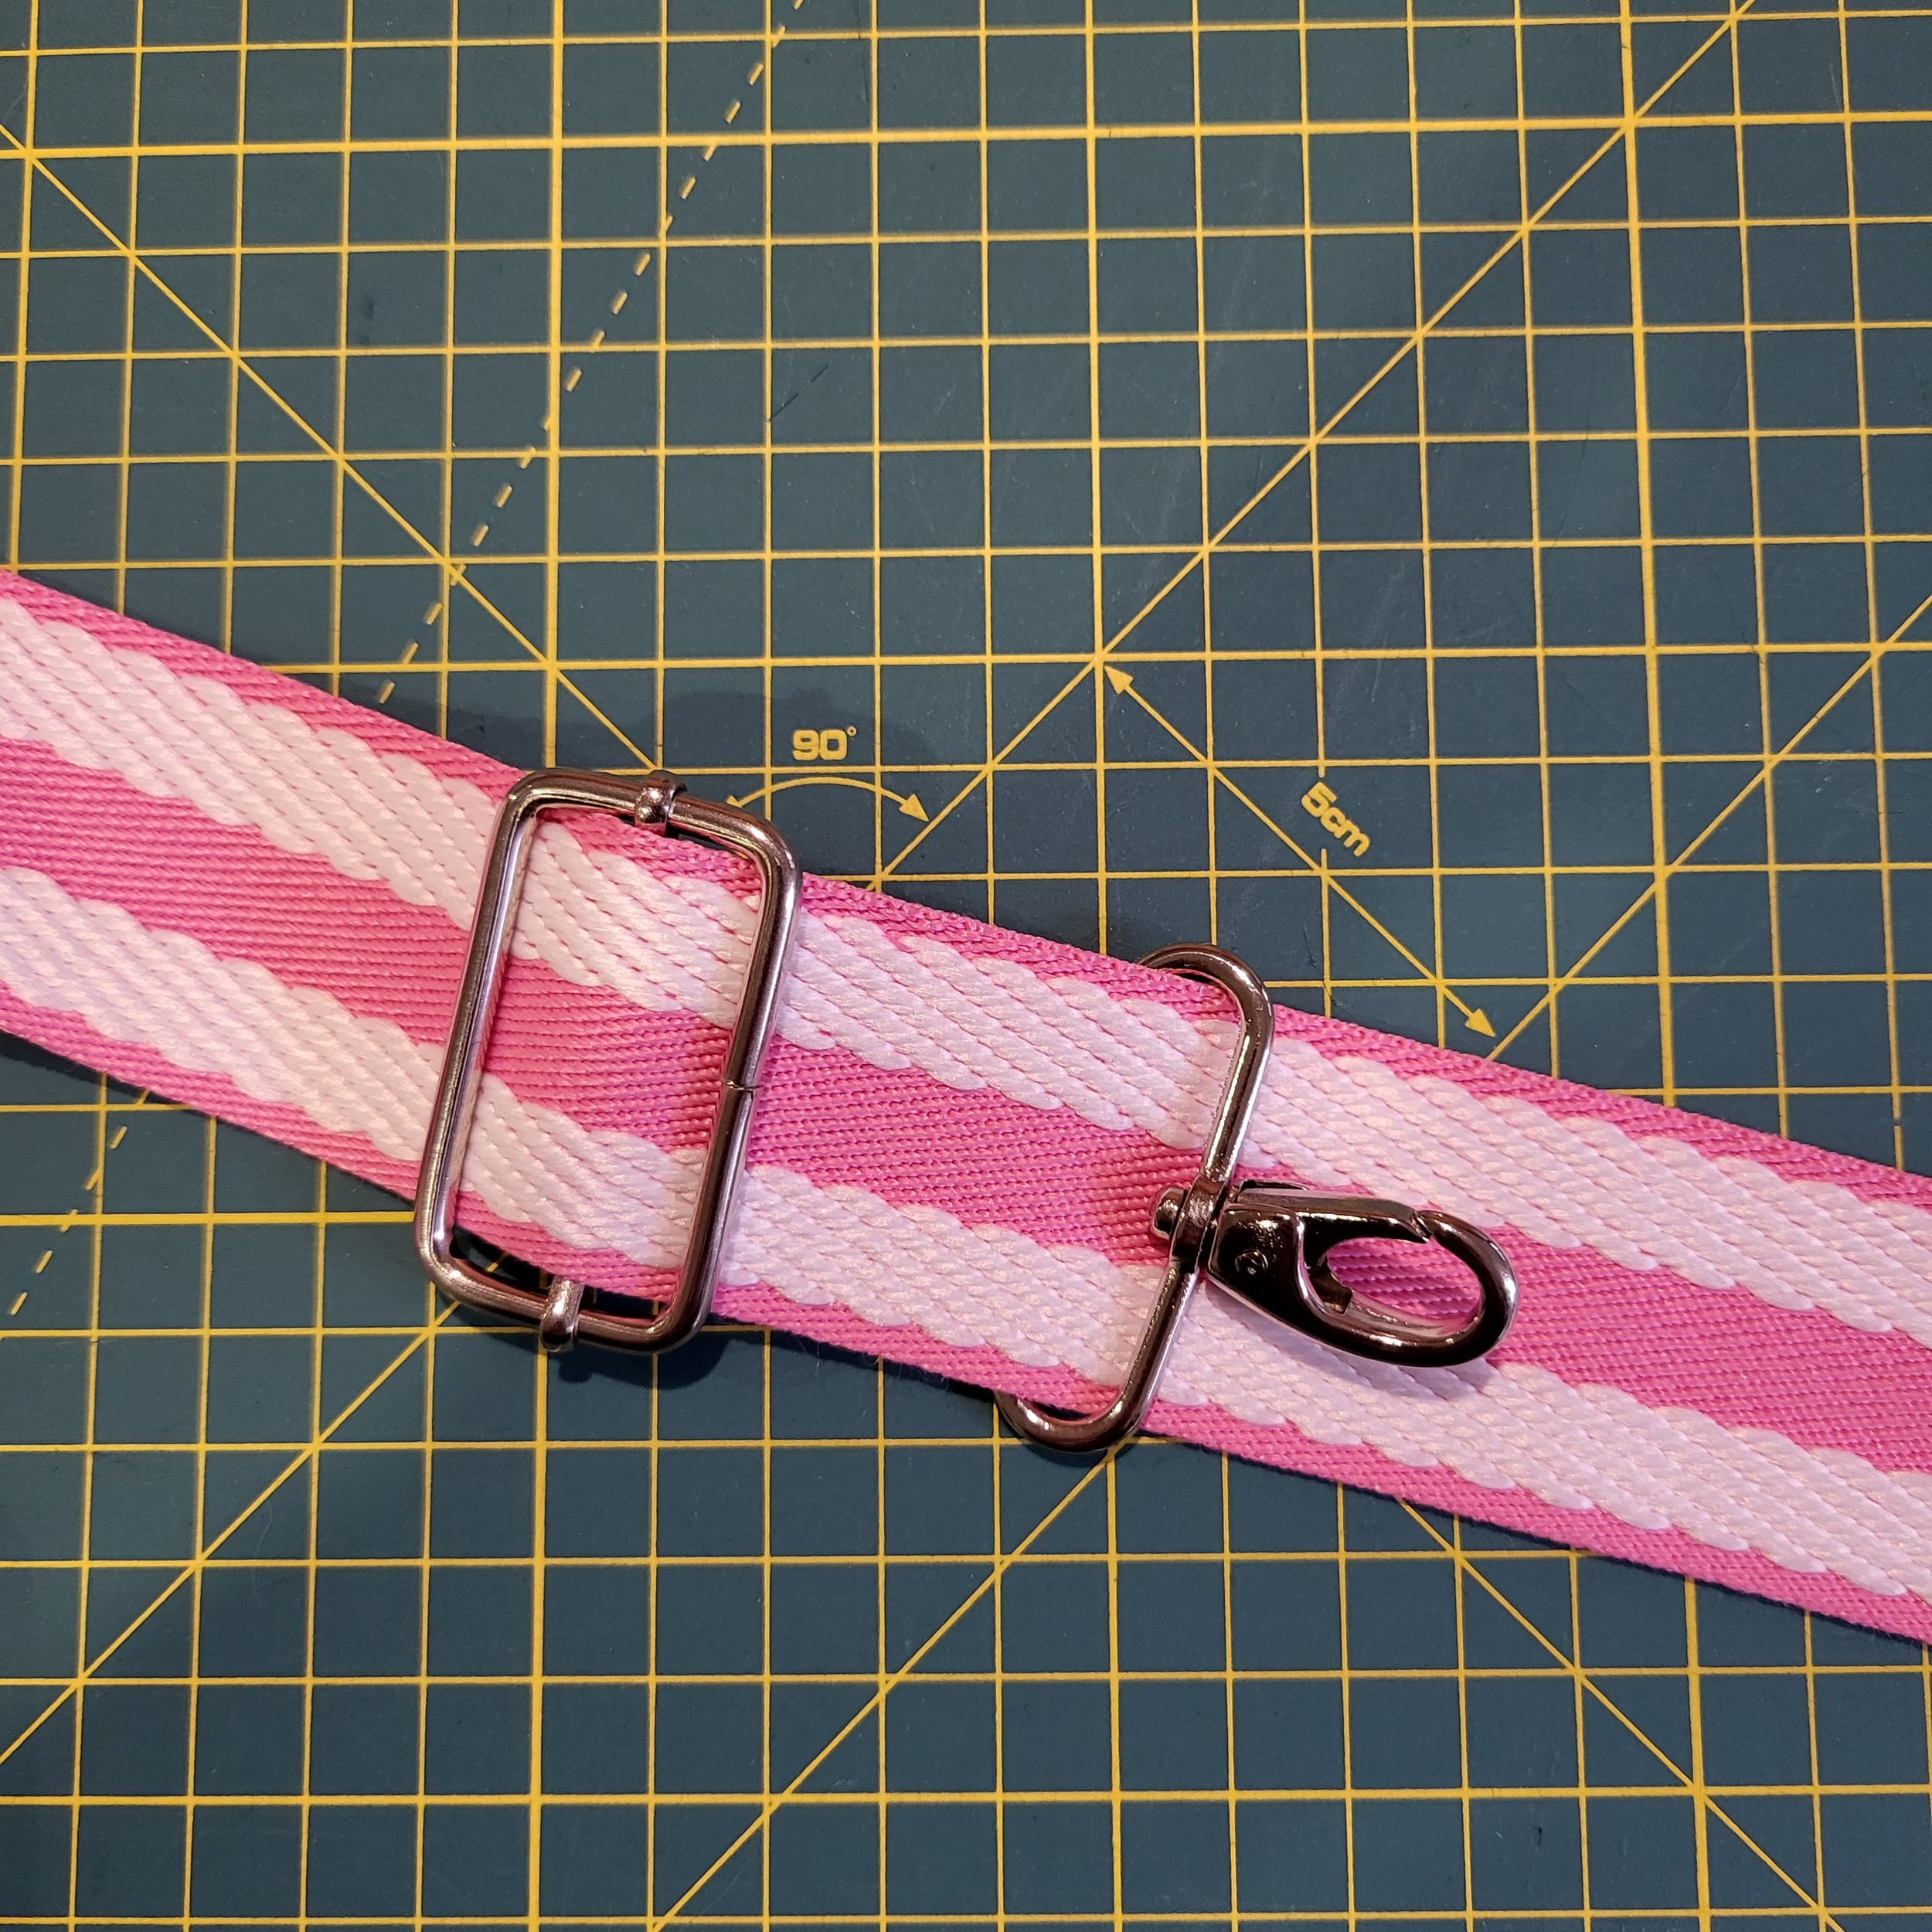
5. With the slider and swivel clasp in position, you’re now going to thread the webbing back through the slider again. It will sit to the underneath of the first pass. This can be a little fiddly, but it can help if you slide excess webbing up into the slider first, so you can see what you’re doing.
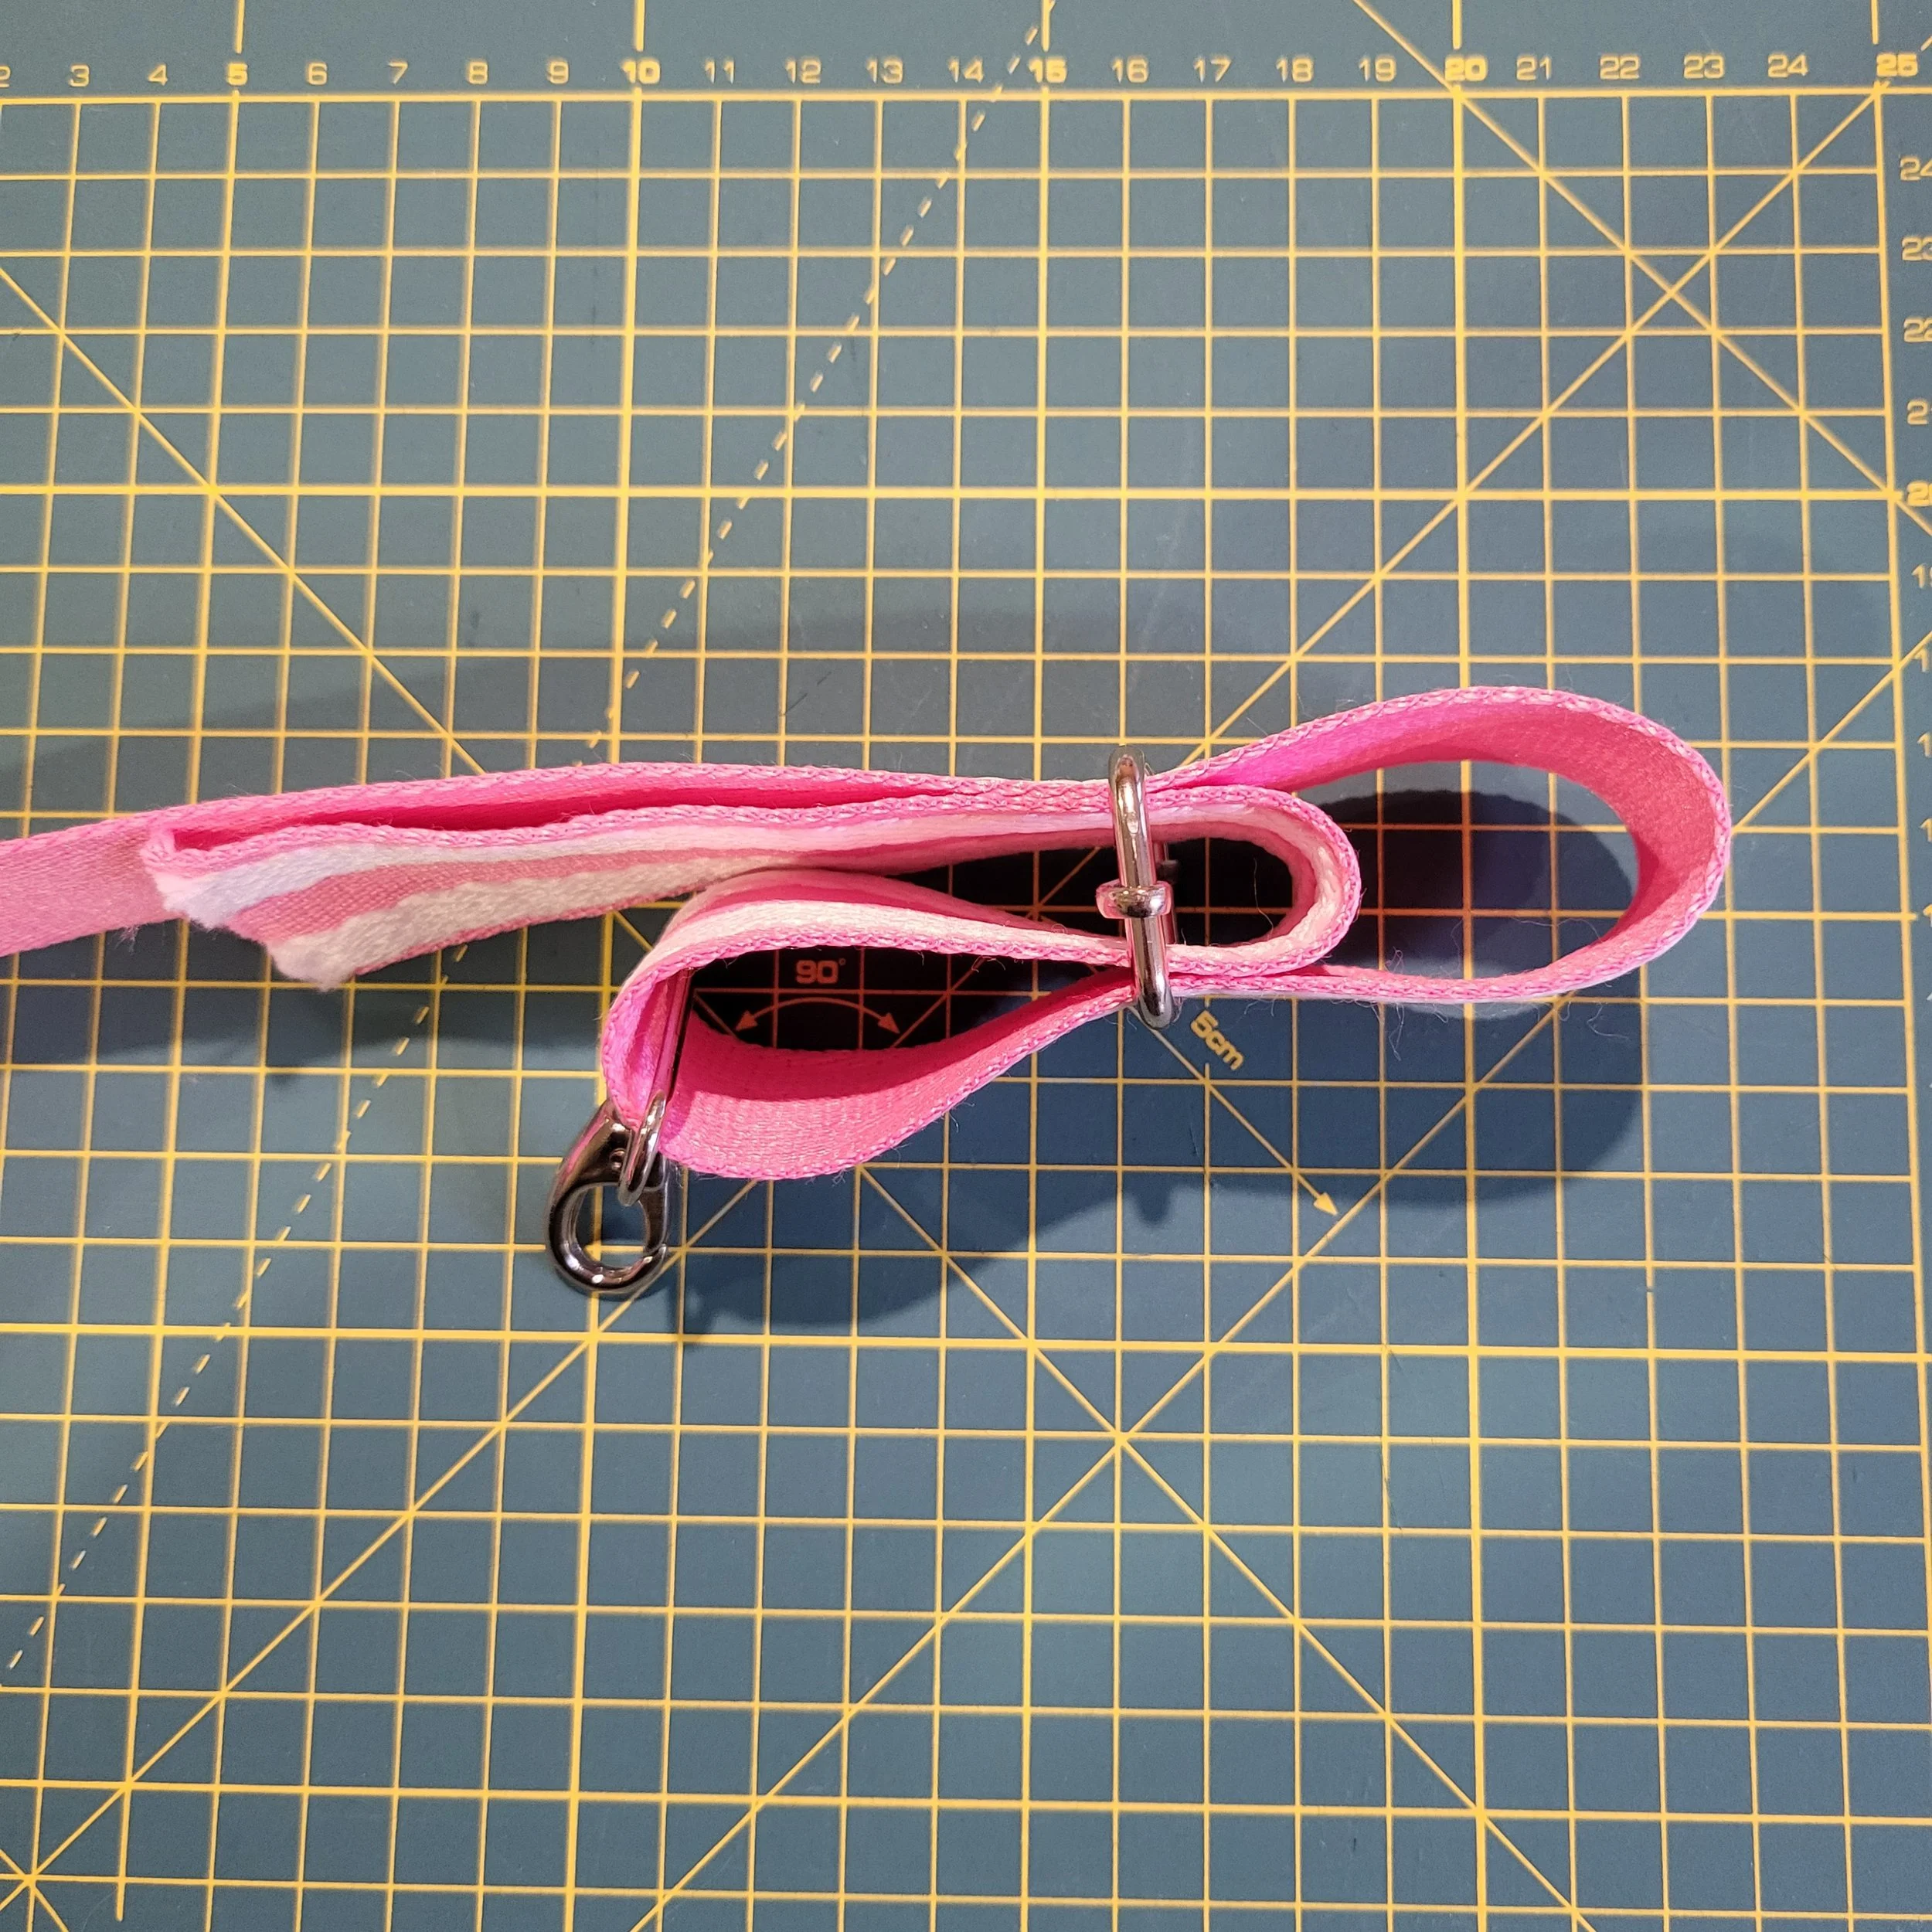
6. With the webbing successfully passed through the slider for the second time, we now need to secure the end in place. To do this, fold under 2.5cm to the right side, and then 2.5cm again to the right side to enclose the raw edge.
Have a look at where the end is going to attach to itself. You want the folded edge to sit about 5cm away from the slider.
Clip in place, and sew.
As before, sewing a square and a cross will give you a nice secure finish.
You’re done!
Take a look at your new bag strap and feel proud of yourself 😊